Create and manage customers
This topic describes how to create and manage customers in the Replicated Vendor Portal. For more information about customer licenses, see About Customers.
Create a customer
This procedure describes how to create a new customer in the Vendor Portal. You can edit customer details at any time. The license ID, which is the unique identifier for the customer, never changes.
For information about creating a customer with the Replicated CLI, see customer create.
For information about creating and managing customers with the Vendor API v3, see the customers section in the Vendor API v3 documentation.
To create a customer:
-
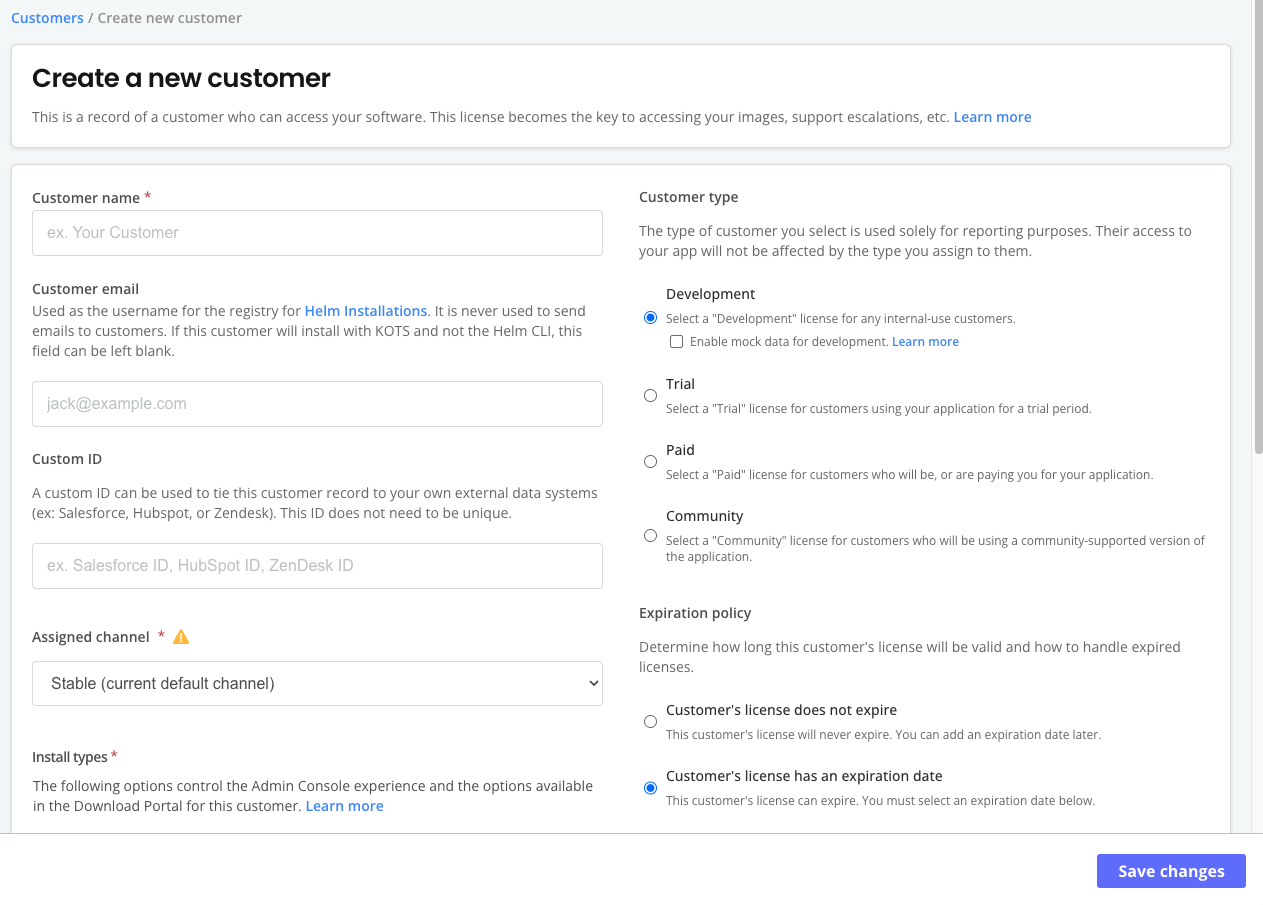
In the Vendor Portal, click Customers > Create customer.
The Create a new customer page opens:
-
For Customer name, enter a name for the customer.
-
For Customer email, enter the email address for the customer. A customer email address is required for Helm installations. This email address is never used to send emails to customers.
-
(Optional) Disable the Send Enterprise Portal invite to customer email checkbox if you don't want the Enterprise Portal to automatically send this customer an invitation. If you disable the checkbox, you can manually invite the customer to the Enterprise Portal later.
noteThe Send Enterprise Portal invite to customer email checkbox appears only when the Enterprise Portal is enabled globally for all customers. For more information, see Automatically invite customers on creation in Manage Enterprise Portal customer access.
-
For Assigned channel, assign the customer to one of your channels. You can select any channel that has at least one release. The channel a customer is assigned to determines the application releases that they can install.
noteYou can change the channel a customer is assigned at any time. For installations with a Replicated installer (Embedded Cluster, KOTS, kURL), when you change the customer's channel, the customer can sync their license in the Admin Console to fetch the latest release on the new channel and then upgrade. The Admin Console always fetches the latest release on the new channel, regardless of the presence of any releases on the channel that are marked as required.
-
For Custom ID, you can enter a custom ID for the customer. Setting a custom ID allows you to easily associate this Replicated customer record to your own internal customer data systems during data exports. Replicated recommends using an alphanumeric value such as your Salesforce ID or Hubspot ID.
noteReplicated does not require that the custom ID is unique. The custom ID is for vendor data reconciliation purposes, and is not used by Replicated for any functionality purposes.
-
For Expiration policy, by default, Customer's license does not expire is enabled. To set an expiration date for the license, enable Customer's license has an expiration date and specify an expiration date in the When does this customer expire? calendar.
-
For Customer type, set the customer type. Customer type is used only for reporting purposes. Customer access to your application is not affected by the type you assign to them. By default, Trial is selected. For more information, see About Customer License Types.
-
Enable any of the available options for the customer. For more information about the license options, see Built-in License Fields. For more information about enabling install types, see Managing Install Types for a License (Beta).
-
For Custom fields, configure any custom fields that you have added for your application. For more information about how to create custom fields for your application, see Manage Customer License Fields.
-
Click Save Changes.
Edit a customer
For online environments, changing license entitlements can trigger changes to the customer's installed application instance during runtime. Replicated recommends that you verify the logic your application uses to query and enforce the target entitlement before making any changes.
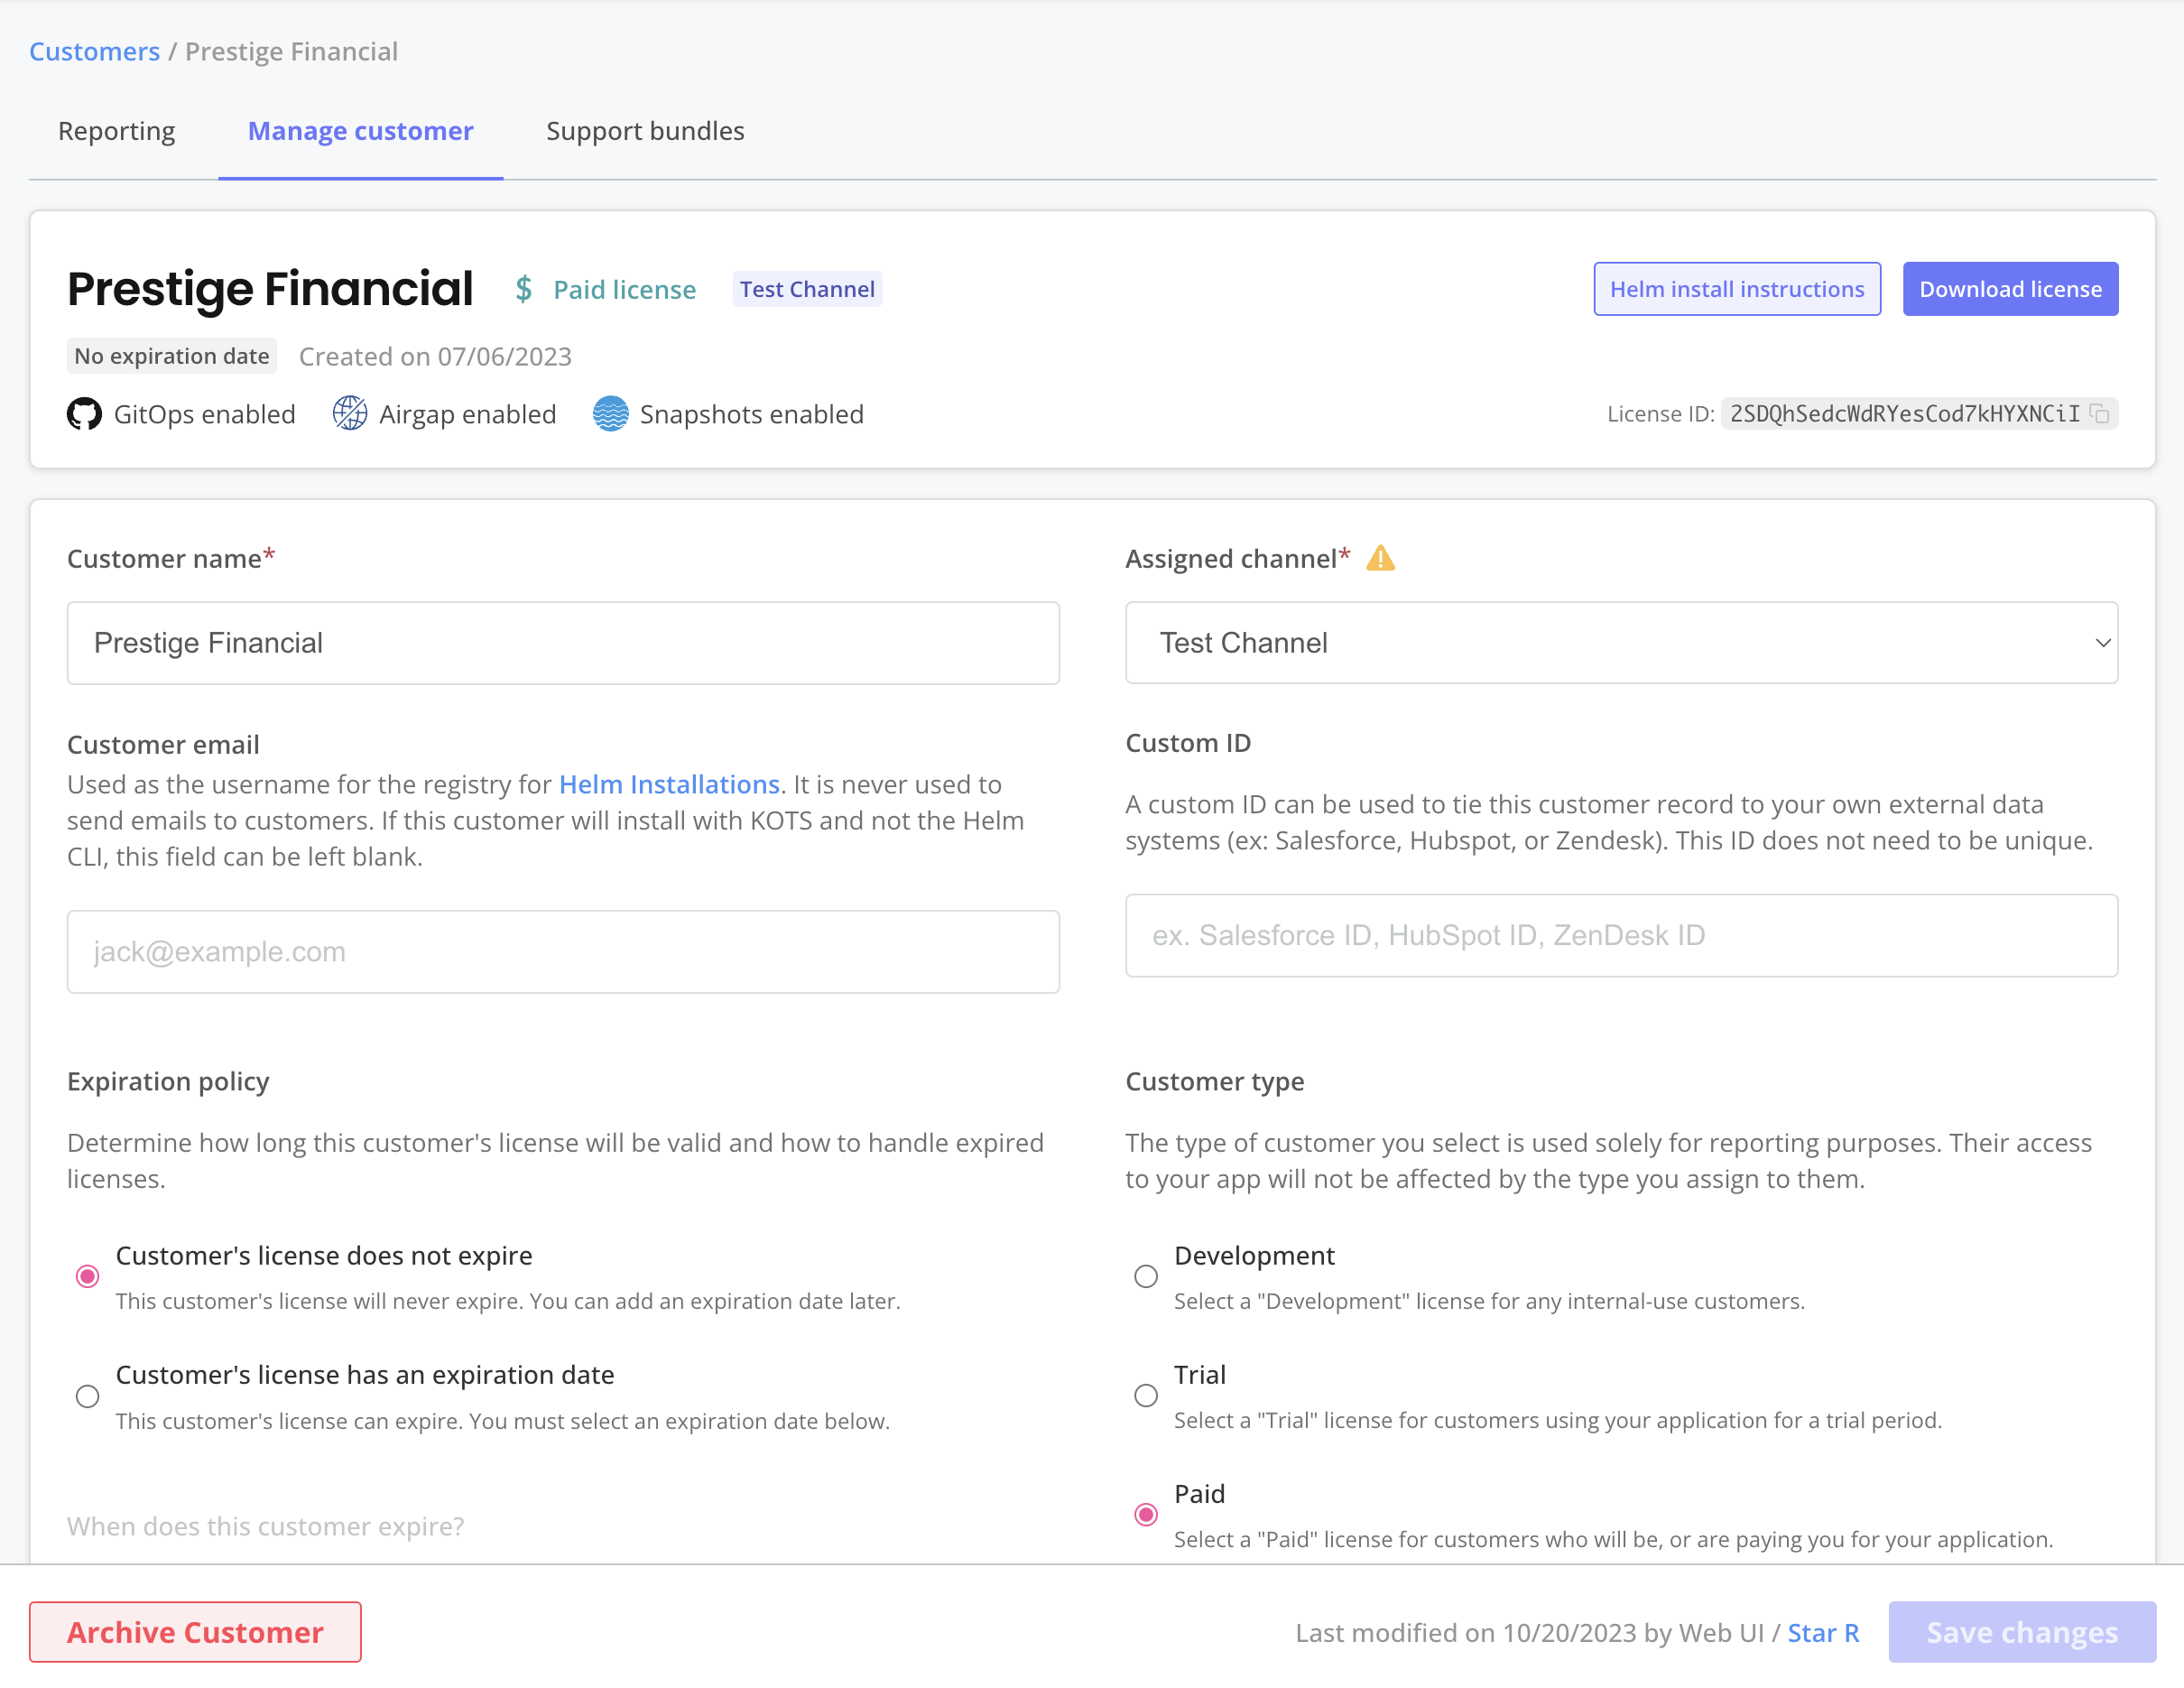
You can make changes to a customer record in the Vendor Portal at any time. The license ID, which is the unique identifier for the customer, never changes.
To edit license fields:
-
In the Vendor Portal, click Customers.
-
Select the target customer and click the Manage customer tab.
-
On the Manage customer page, edit the desired fields and click Save.
-
Test the changes by installing or updating in a development environment:
- For applications installed with Helm that use the Replicated SDK, you can add logic to your application to enforce entitlements before installation or during runtime using the Replicated SDK API license endpoints. See Check Entitlements in Helm Charts Before Deployment.
- For applications installed with a Replicated installer (Embedded Cluster, KOTS, kURL), update the license in the Admin Console. See Update Online Licenses and Update Air Gap Licenses in Updating Licenses in the Admin Console.
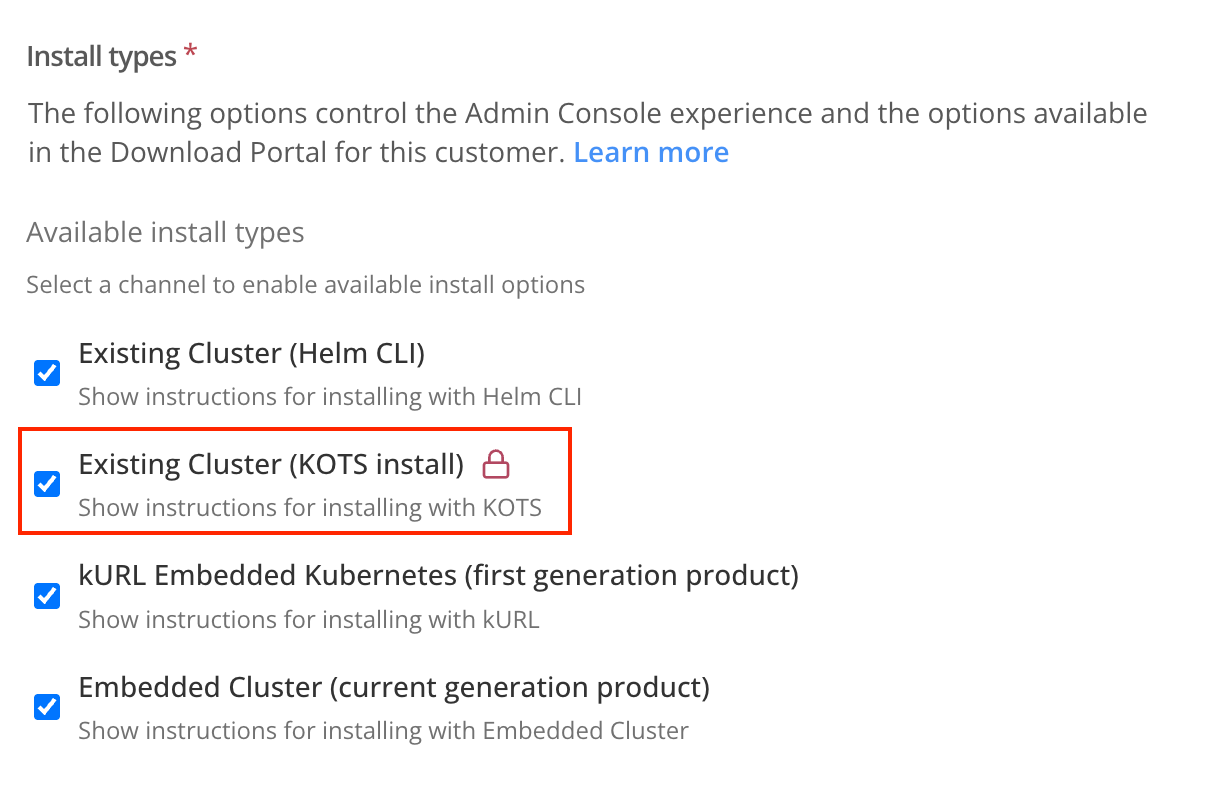
Edit a locked license field
When a license field is locked, a lock icon is displayed on both the Create a new customer and Manage customer pages. For more information about how to lock and unlock license fields, see Lock Built-In License Fields in Manage Customer License Fields.
To edit a locked field:
-
On the Create a new customer page or the Manage customer page, click the lock icon to temporarily unlock the field.
Archive a customer
When you archive a customer in the Vendor Portal, the customer is hidden from search by default and becomes read-only.
Archiving a customer does not change the functionality or utility of licenses downloaded before the customer was archived. To expire a license, set an expiration date and policy in the Expiration policy field before you archive the customer.
To archive a customer:
-
In the Vendor Portal, click Customers. Select the target customer then click the Manage customer tab.
-
Click Archive Customer. In the confirmation dialog, click Archive Customer again.
You can unarchive by clicking Unarchive Customer in the customer's Manage customer page.
Manage customer instances
Archive or unarchive an instance
You can archive application instances that are inactive, air gap, or installed with a Development license. Archiving an instance hides it from all views in the Vendor Portal. You can unarchive an instance at any time to restore it to the active instances list.
To archive or unarchive an instance:
-
From the Instance details page for the target instance, click Archive instance or Unarchive instance.
noteThe Archive instance button is visible on the Instance details page for all instances, but if the instance is active, online, and installed with a production or trial license, the archive request returns an error.
-
In the confirmation dialog, click Archive or Unarchive.
Bulk archive instances
You can archive up to 100 instances in a single bulk operation.
When you bulk archive, the Vendor Portal archives all eligible instances and skips any instances that do not meet the archiving criteria (for example, active production instances).
To bulk archive instances:
-
On the Customers > Instances tab, click the archive icon in the table toolbar to enable bulk selection mode.
-
Select the instances that you want to archive by using the checkboxes in each row.
-
Click Archive instances.
-
In the confirmation dialog, click Archive.
A summary shows how many instances were archived and lists any skipped instances with the reason they were skipped.
Search customers
You can search your customers using filters in the Vendor Portal. If you want to filter using multiple license types or channels, you can download a CSV file instead. For more information, see Export customer and instance data on this page.
To filter and search your list of customers:
-
On the Customers page, use the search box and filters to find customer records. For example, you can filter by active or inactive customer records, license type, release channel, and more.
To filter customers by custom ID or email, use the search box and prepend your search term with "customId:" (ex:
customId:1234) or "email:" (ex:email:bob@replicated.com).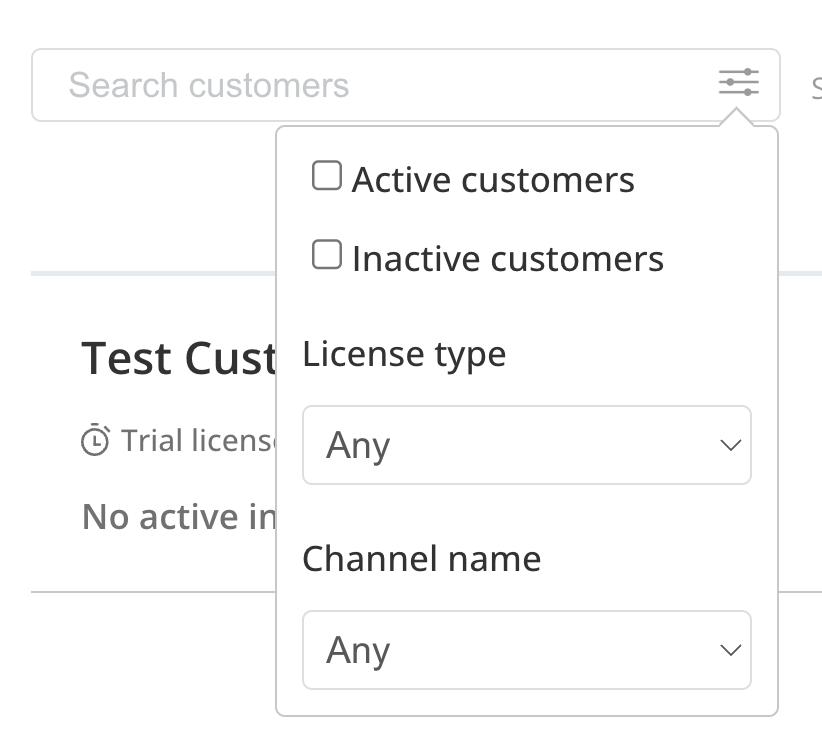
View archived and inactive instances
By default, the Vendor Portal hides archived and inactive instances from each customer's Instances list.
To view archived and inactive instances:
- Go to the Customers page, select the customer, and go to the Reporting tab. Scroll to the Instances section and enable the Show archived instances or Show inactive instances checkboxes.
Export customer and instance data
You can download customer and instance data from the Download CSV dropdown on the Customers page:
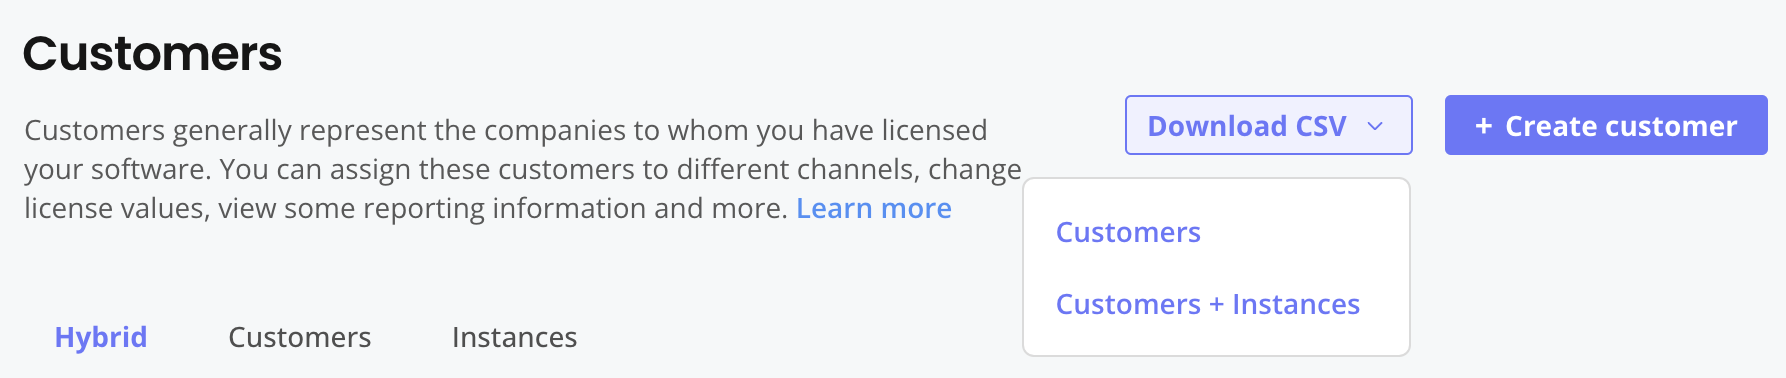
View a larger version of this image
The Download CSV dropdown has the following options:
-
Customers: Includes details about your customers, such as the customer's channel assignment, license entitlements, expiration date, last active timestamp, and more.
-
(Recommended) Customers + Instances: Includes details about the instances assoicated with each customer, such as the Kubernetes distribution and cloud provider of the cluster where the instance is running, the most recent application instance status, if the instance is active or inactive, and more. The Customers + Instances data is a super set of the customer data, and is the recommended download for most use cases.
You can also export customer instance data as JSON using the Vendor API v3 customer_instances endpoint. For more information, see Get customer instance report in CSV or JSON format in the Vendor API v3 documentation.
For more information about the data fields in the CSV downloads, see Data Dictionary in Export customer and instance data.
Replace a license in an existing installation
Unless the existing customer is using a Community license, it is not possible to replace one license with another license without reinstalling the application. When you need to make changes to a customer's entitlements, Replicated recommends that you edit the customer's license details in the Vendor Portal, rather than issuing a new license. For more information, see Community Licenses.